
Felhasználói eszközök
Tartalomjegyzék
User's guide
Transport and storage
The packaging is designed to protect the product from the usual levels of physical impact during transport. Be careful to avoid effects other than these.
The packaging of the product is not water, flame and heat resistant and only moderately pressure resistant. Therefore, do not keep the box in a humid environment, within the range of heat emitting equipment, or place heavy objects on it.
Commissioning
The package consists of a box containing the device and its accessories.
Unpacking
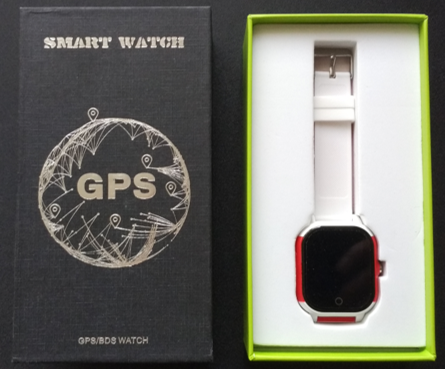
- Open the box.
- Remove the product.
- Remove the retaining insert to protect the device.
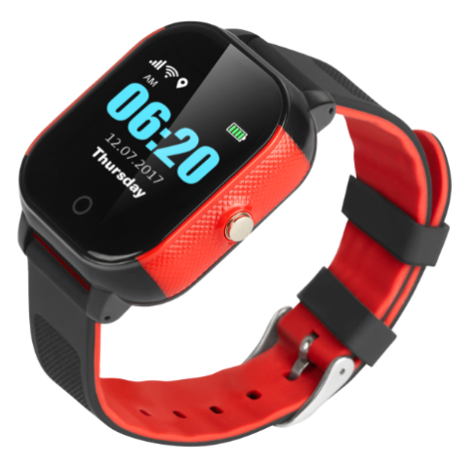
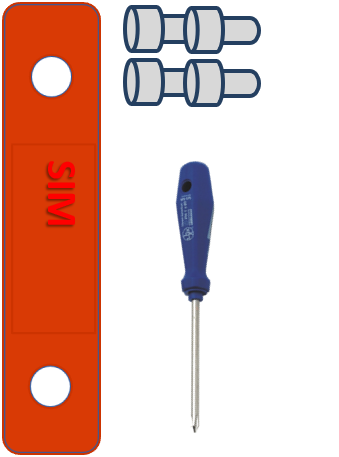
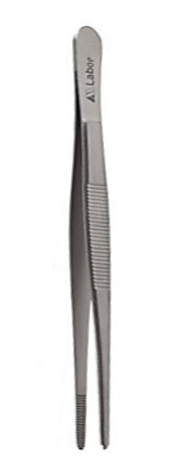
- Remove the accessories below.
| 1 tracking smart watch | SIM card cover, screwdriver, screws | SIM card removal tweezers | 1 USB cable | 1 installation instructions |
 |
 |
 |
 |
|
Preparing the SIM card
As with mobile phones, a SIM card is required to operate the device. The device communicates with the mobile service provider's network via SIM card, SMS or mobile phone or PC applications.
You can purchase the card independently from your mobile service provider or, in the case of a software subscription, from your product distributor. If you received the SIM card from your dealer, you do not need to make any settings: the card is already set up, inserted in the device, switched on and ready for use.
If you have received the SIM card from your dealer, do not try to transfer it to another device (eg phone) and use it! The distributor (service provider) will reimburse the resulting costs or the correction of the resulting errors.
Settings for your SIM card
If you did not obtain the SIM card from your tracking device vendor, you must set it up before inserting and using it in the device, which you can do as follows.
Disable SIM card PIN and other functions
- Insert the SIM card in your phone.
- Among the setting functions of the phone
- turn off the PIN code request, auto-reply and call forwarding options.
After turning off the above, insert the card into the tracking device. See the next section for instructions on how to insert the SIM card.
Setting up data traffic
If you want to operate the device not only via SMS, but also e.g. If you use the software tracking service provided by your dealer, you must activate GPRS (Internet) data traffic and enter the appropriate network settings. To do this, you need to send SMS messages from your phone to the phone number of the SIM card inserted in the tracking device, as shown in the table below.
The factory-set access password for the tracking device in the commands: 123456
| Setting | SMS | Device response |
|---|---|---|
| Turn on GPRS data traffic | gprs123456 | GPRS ok |
| Setting the APN name | pw,123456,apn,apn-name,apn-username,apn-password,MCC/MNC code# | apn ok |
| APN names for domestic service providers:
In case of problems, check the exact settings with your mobile service provider!
Telenor: online or net
Telekom: internet
Vodafone:
Digi: internet |
||
| If your mobile network provider has not provided you with an APN username and password, you do not need to send the following SMS messages to the tracking device! | ||
| APN username | apnuser123456(space)APN-username | apnuser ok |
| APN password | apnpasswd123456(space)APN-password | apnpasswd ok |
Inserting the SIM card
Only micro-sized SIM cards can be used with this product.
Insert the SIM card into the device as follows:
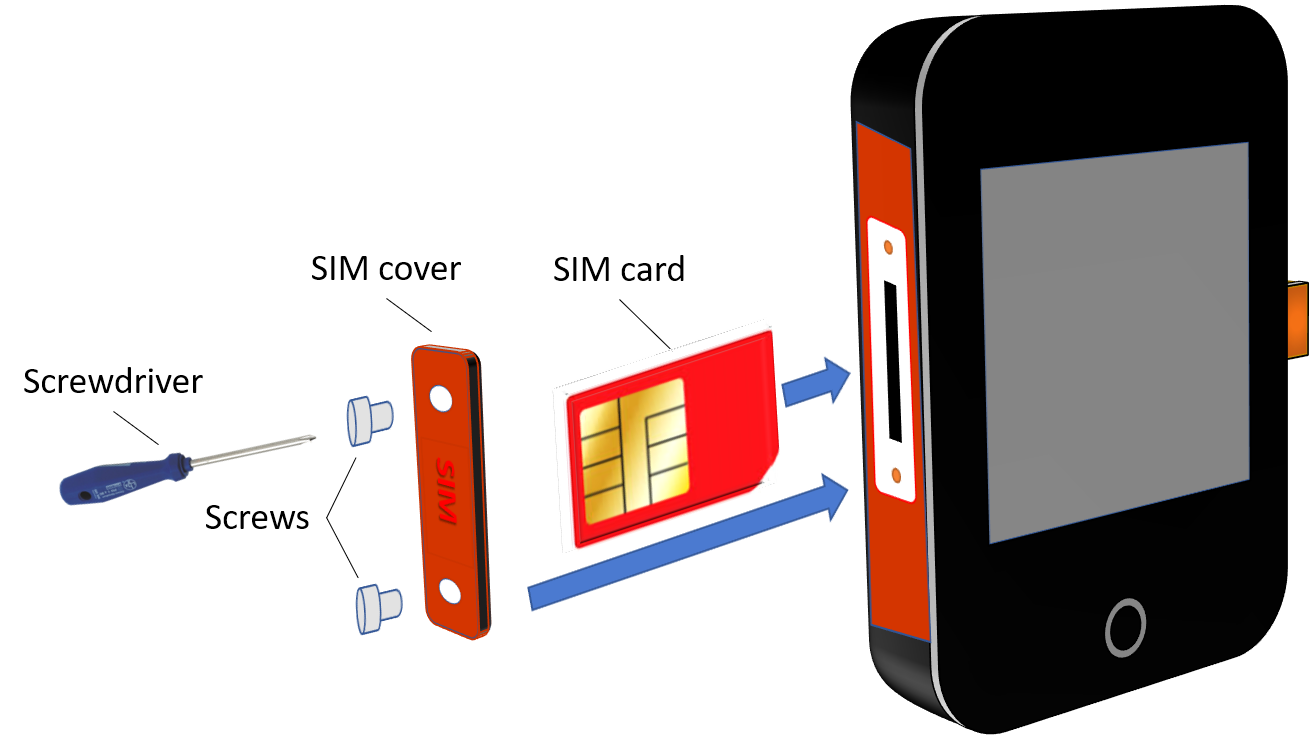
Steps:
- Unscrew the protective cover.
- Insert the card into the slot on the left side of the watch, chip up, in the direction of the buttons.
- Screw the protective cover back on.
Charging the battery
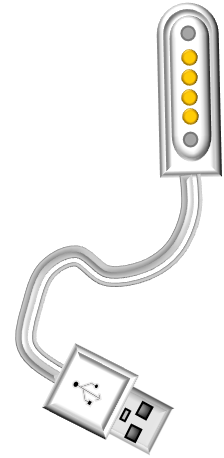
The watch is powered by a built-in battery, which needs to be charged at different intervals depending on the intensity of use. The magnetic charging cable connector is located on the back of the device. The correct connection of the cable is facilitated by the attraction / repulsion of the magnet.

Charging is indicated continuously by the battery level indicator on the front of the watch. You can check the charge level by disconnecting the charging cable.
When the battery is fully charged, disconnect the charging cable. The device is protected against overcharging, but prolonged, continuous charging will shorten battery life. A charger with a maximum current of 1 A may be used for the clock with a voltage of 5V! Chargers with a higher capacity can damage the battery.
Application installation, access
In order to operate the device and other services based on it, the distributor provides mobile and computer applications in the subscription system. The PC program is accessible via a browser at https://gpspositions.net/map/, and you can install the phone application on your phone in one of the following ways:
For Android phones

- Open the Google Play app on your phone.
- Search for “Flexcom” or “Flexcom tracking” on Google Play.
- Install the tracking application.
or
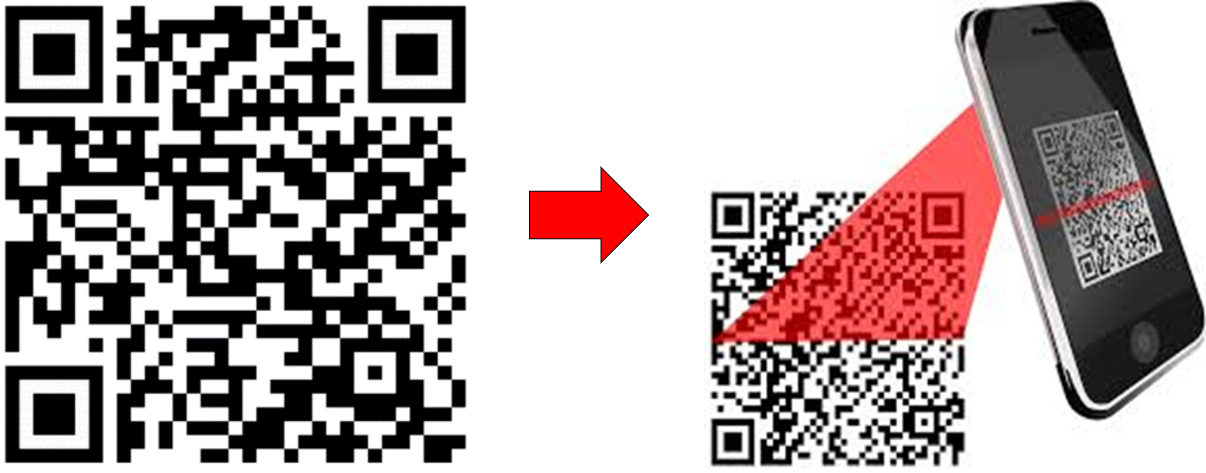
- Scan the QR code shown here with your phone.
- Open the web address decoded from this.
- Install the Flexcom tracking application.
For iPhones
Use the browser on your phone to access the service (https://gpspositions.net/map/).
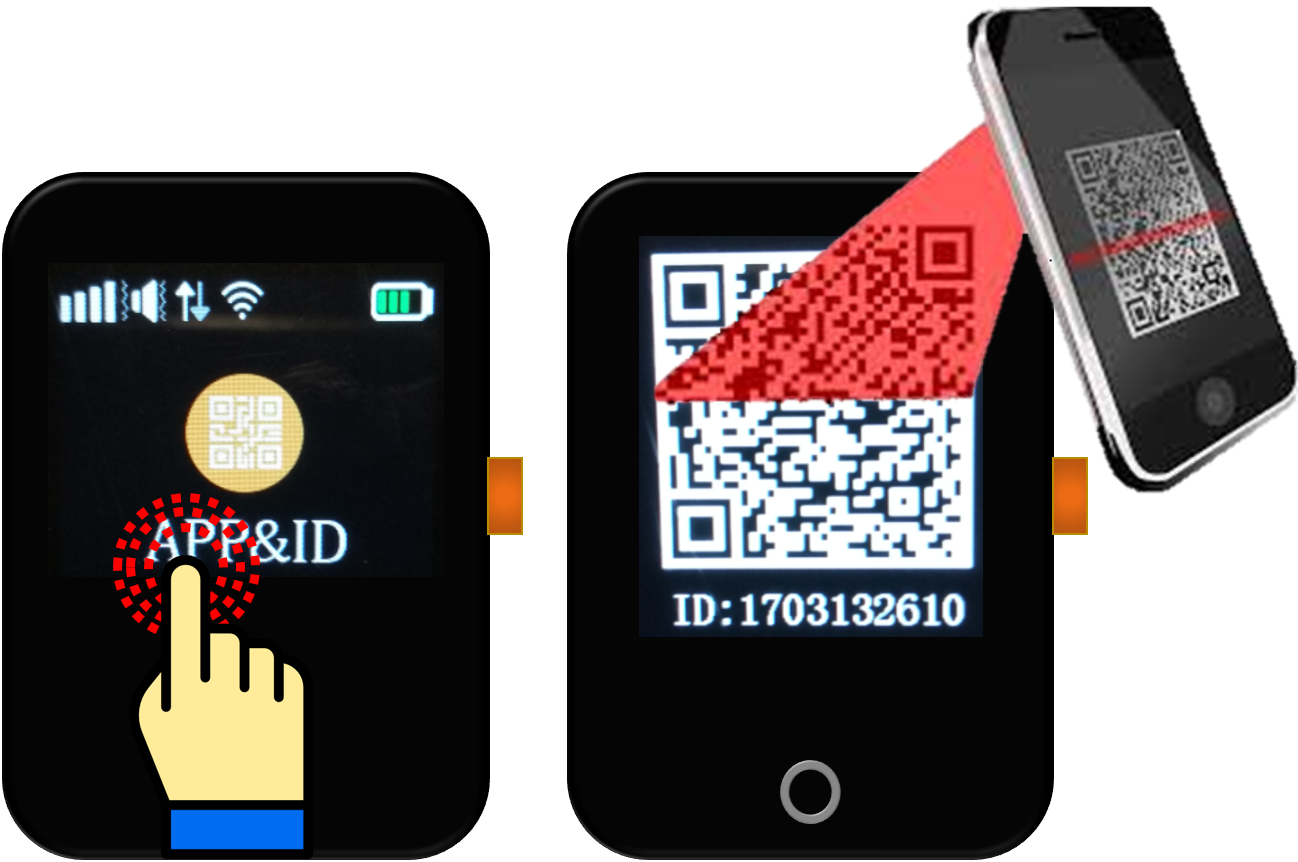
Application download location on the watch touch screen
The address of the application's website can also be read from the watch in a QR code. After reading the code, you can open the website on your phone and install the application.
Steps
- Scroll to the APP & ID function of the watch and tap on the display.
- The QR code appears on the clock display.
- Scan the code with your phone's code reader service. In different types of phones, the QR code reader function can be used in different places and names - but usually in Applications, Tools, and so on. can be found by clicking on the icon labeled.
- Select to open the page on your phone.
Use of the product
User interface
The display
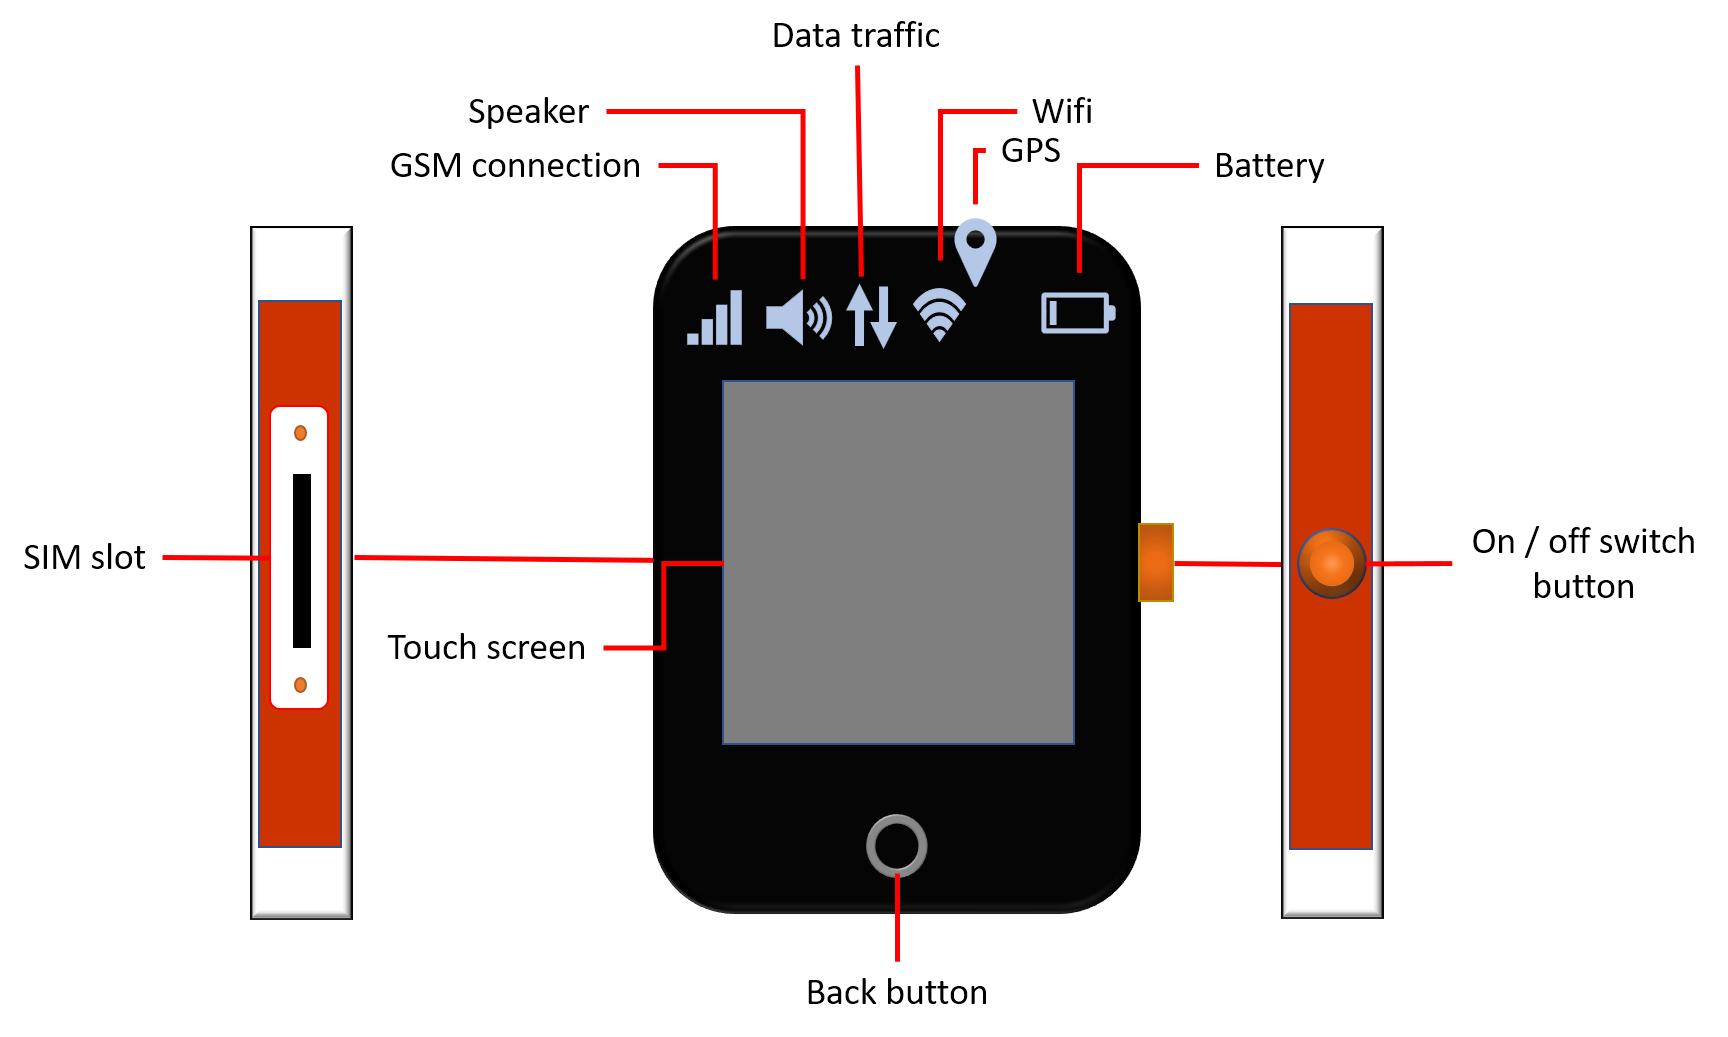
The clock display is divided into three parts:
- Top: Display of network connections, data traffic and battery charge.
- Middle part: The area of operation of the various services.
- Bottom: Back button.
What each icon means
- GSM connection: The strength of the mobile service provider's connection required to operate the SIM card.
- Speaker: When the icon is displayed, the device speaker is working.
- Data traffic: Indicates the current traffic on the GSM connection.
- Wifi: The strength of the Wifi connection. If your device is not connected to a Wifi network but has a satellite connection, the display shows the GPS icon instead of Wifi.
- Battery charge: Battery charge level.
Controls
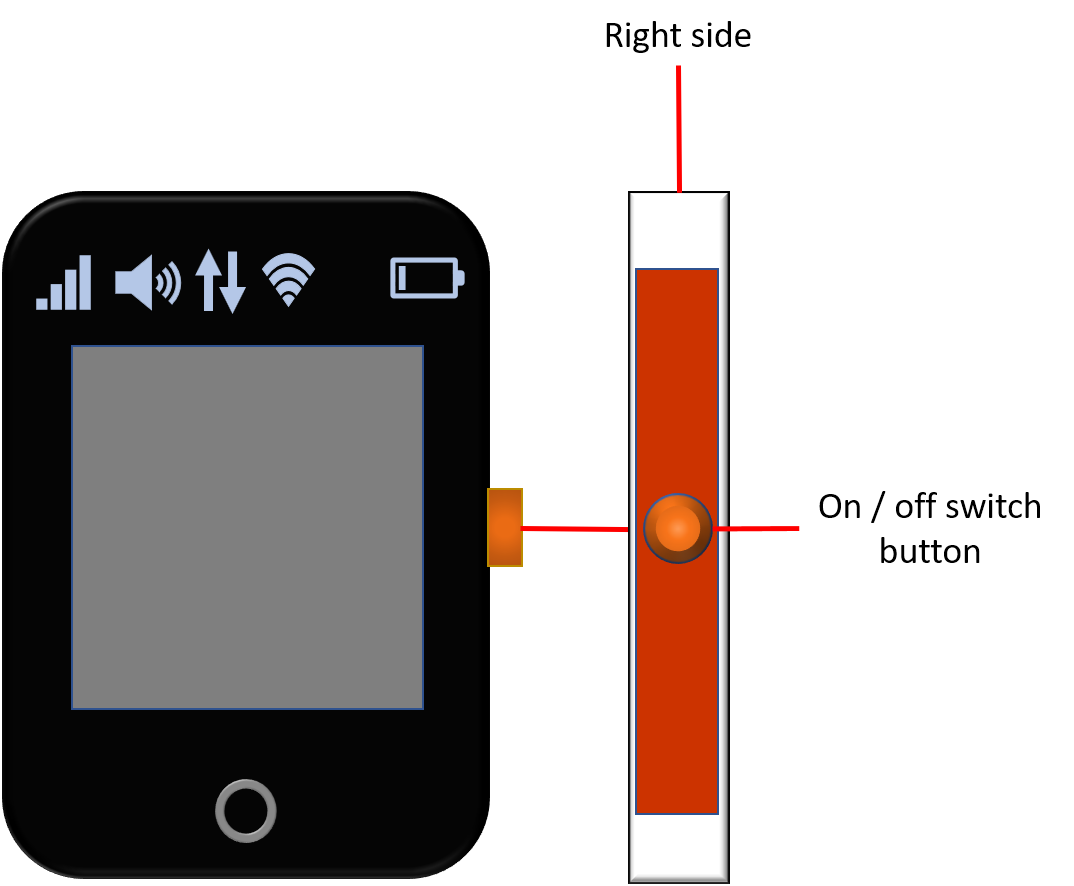
In the middle part of the screen you can view the time, switch between the different functions and operate them. The device has a touch screen: you can navigate between and within services with scrolling or tapping with your finger on the interface. Within a given function, you can return to the previous level with the Back button. On the right side of the device there is a switch button to switch the clock on or off or to reactivate it from standby.
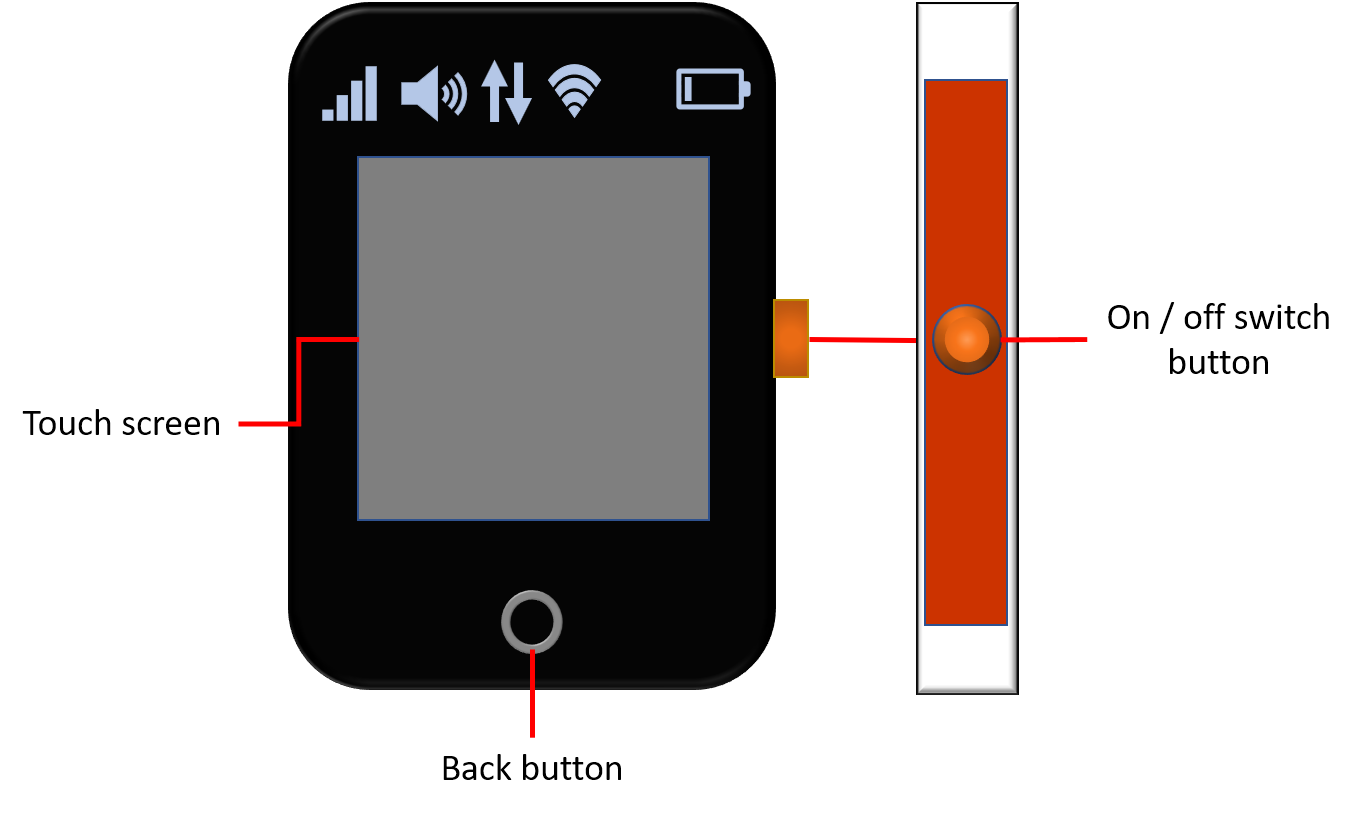
Be careful not to accidentally press the switch button while using or storing the watch, as this may result in unintentional switching on or off or malfunction.
Switching on and off
The clock can be turned on or off using the button on the right.
Switching on

Steps:
- Press and hold the switch button until the Flexcom logo appears on the display (3-5 seconds).
- When the logo appears, release the button.
- The display shows the current time and date. This indicates that the clock is on.
If, after being turned on, the startup screen appears for a moment and then disappears immediately and the clock turns off, it means that the battery is completely discharged. Connect the charger and wait until the charge level reaches the minimum required for operation (a green line on the display).
Switching off
- If there is a SIM card in the device, press the power key 10 times in a row.
- If there is no SIM card in the device, press and hold the power key for 3-5 seconds.
- The Flexcom logo is displayed before switching off.
Standby mode
If the clock is on but no operations are performed, the display dims (standby mode) to save power.

Reactivate the display
- Press the switch button once. The display will then show the analog clock face showing the current time.
- Tap the dial.
- The clock enters the active mode, the screen shows the interface of the last function used.
Normal operation of the device
Setting options via software
When using the desktop or mobile application of Flexcom Kft, the setup operations related to tracing can be accessed in the following ways.
The settings and commands that can be issued depend on the type of device. See the rest of this guide for information on options for this device.
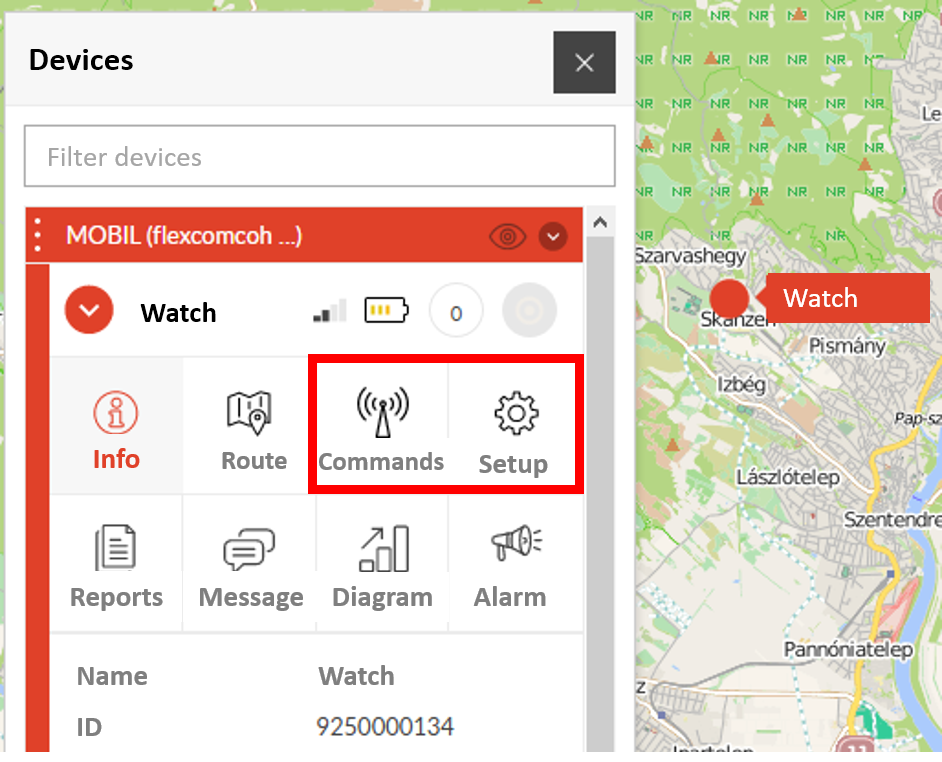
When using a desktop application:
|
Select the desired device on the map or in the menu.
Click the Settings or Commands button to select the general setting or behavior you want. |
 |
When using a mobile application:
| From the application menu, select Map. | 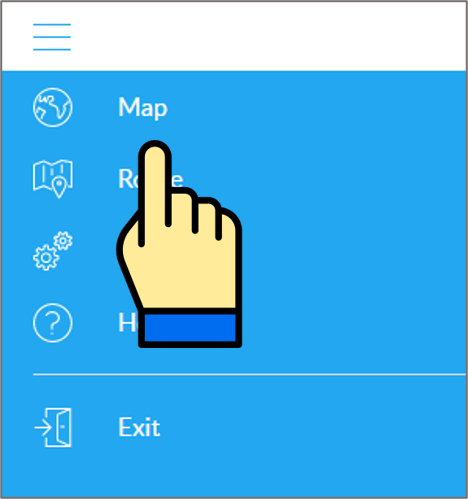
|
| Switch to the Tools panel. | 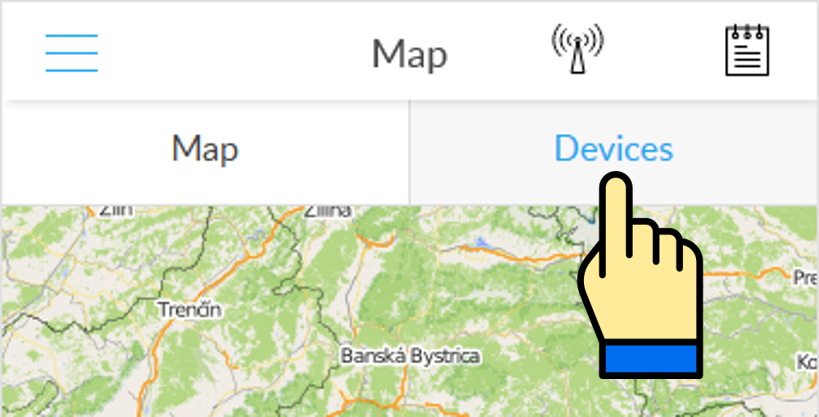
|
| Find your device in the list of devices and tap the Setup icon next to the ID. | 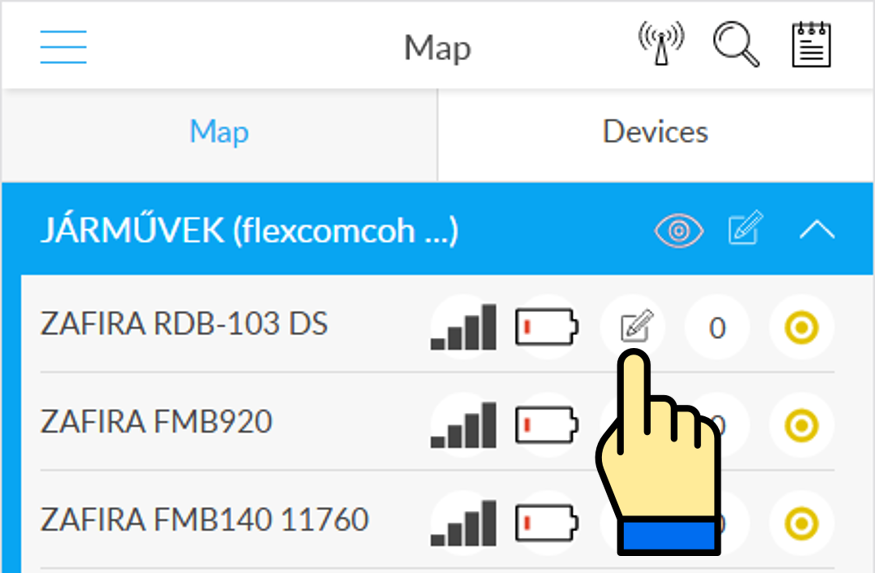
|
| Select the desired setting or, when sending a command, select Commands. | 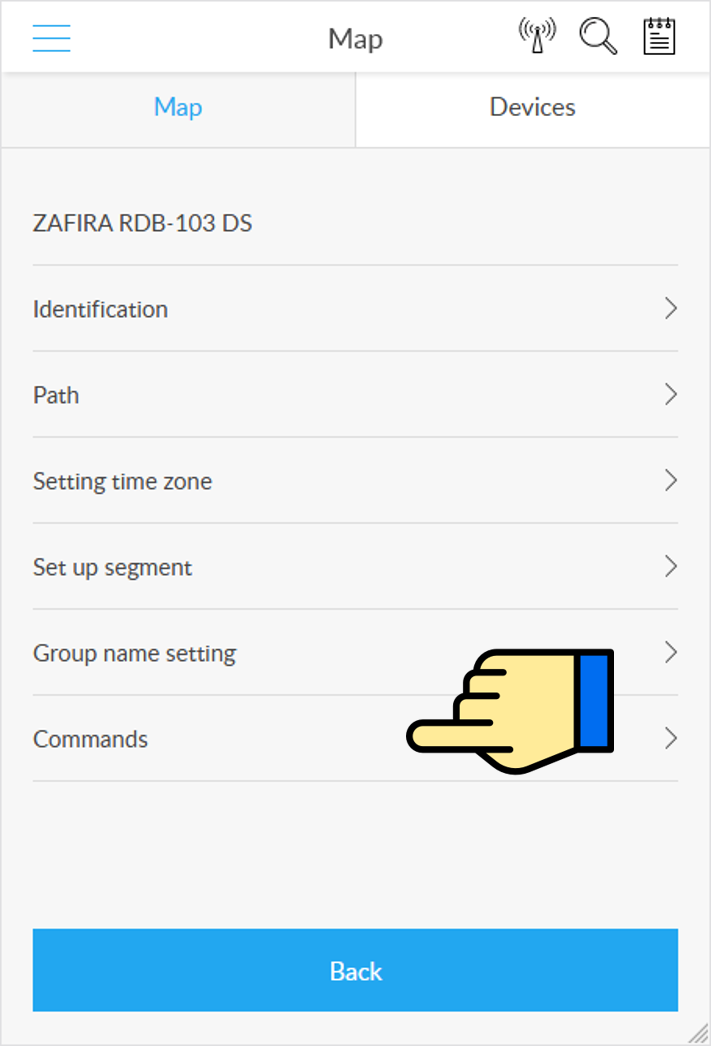
|
Operation of the watch with SMS messages
If you do not use the software service provided by your service provider, you can also use the SMS to send the clock with limited functionality: you need to send an SMS to the phone number of your device's SIM card in the usual way.
In the commands, the factory-set access password for the device is 123456
| Function | SMS |
|---|---|
| Position query |
SMS: pw,123456,url# Reply In an SMS, the watch sends a link to a Google map showing its current position (coordinates), for example: http://maps.google.com/hk/maps?q=N22.576543,E54.563253 Tap the link to display the corresponding Google Maps detail in your phone's browser. |
| SOS phone number setting |
SMS: pw,123456,SOS1,xxxxxxxxxxxx
where xxxxxxxx: the phone number to call when you press SOS.
Example: pw,123456,SOS1,0036206766884
|
| Set language and time |
SMS: pw,123456,lz,<language code>,x#
where
  - language code: 34 (Hungarian)
  - x: 2, daylight saving time
  - x: 1, winter time

Example: pw,123456,lz,34,1# (use of Hungarian language, summer time)
|
| Set time |
The clock sets the displayed date and time using the GPS satellite connection. This is completely automatic, and if the values are correct, we don’t have to worry about setting them. If this is still necessary, proceed as follows:
SMS: pw,123456,time,hh.mm.ss,date,yyyy.mm.dd#
where
  - hh.pp.mm is the time to be set, e.g. 13.41.00, and
  - yyyy.mm.dd is the date to be set, e.g. 10/19/2018
|
| Time display format |
SMS: pw,123456,timeformat,0# (12 hours)
SMS: pw,123456,timeformat,1# (24 hours)
|
| Mode setting |
SMS: pw,123456,profile,1# (voice mode)
SMS: pw,123456,profile,4# (silent mode)
|
| Frequency of data upload |
SMS: pw,123456,upload,sec#
where
  - sec is the frequency in seconds

Example: pw,123456,upload,30# (charging every half minute)
When setting the data upload frequency, make sure that the watch only updates the GPS coordinates in all positions if the frequency is set to 10 or 30 seconds - otherwise (eg at 60 seconds) only if you are moving, or we will force this with the following SMS: pw,123456,CR where the CR parameter is mandatory uppercase!
|
| Do not disturb the setting and switching off period |
SMS: pw,123456,SILENCETIME,hh:mm-hh:mm,,,#
where hh: mm: start of period - end of period.

Example: pw,123456,SILENCETIME,08:00-15:30,,,#
Turning off: pw,123456,SILENCETIME,,,,#
|
| Set and turn off an alarm |
SMS: pw,123456,REMIND,hh:mm-x-y#
where
 - hh: mm: alarm time.
 - x: profile.
 - y: signal repeat.

Example: pw,123456,REMIND,14:45-1-1# (alarm at 14:45, according to profile 1, signal 1 time).
Turning off: pw,123456,REMIND,14:45-0-1#
|
| Restart the device |
SMS: pw,123456,REBOOT#
|
| Switch off the device |
SMS: pw,123456,POWEROFF
|
| Phone numbers that can be called from the clock |
SMS: pw,123456,WHITELIST1,xxxx,yyyy,zzzz,...#
where
 - xxxx, yyyy, zzzz, …: telephone numbers (up to 10).

Example: pw,123456,WHITELIST1,00361234567,00362012345#
|
| Turn step count on and off |
A telephone application is required to operate the counter!
SMS: pw,123456,PEDO,1# (turning on)
SMS: pw,123456,PEDO,0# (turning off)
|
SOS call
If approx. Press and hold the power button on the device for 3 seconds, it will dial the set SOS phone numbers in sequence until it is successful or no connection has been established twice.
Chat
Feature not currently supported in app.
Telephony
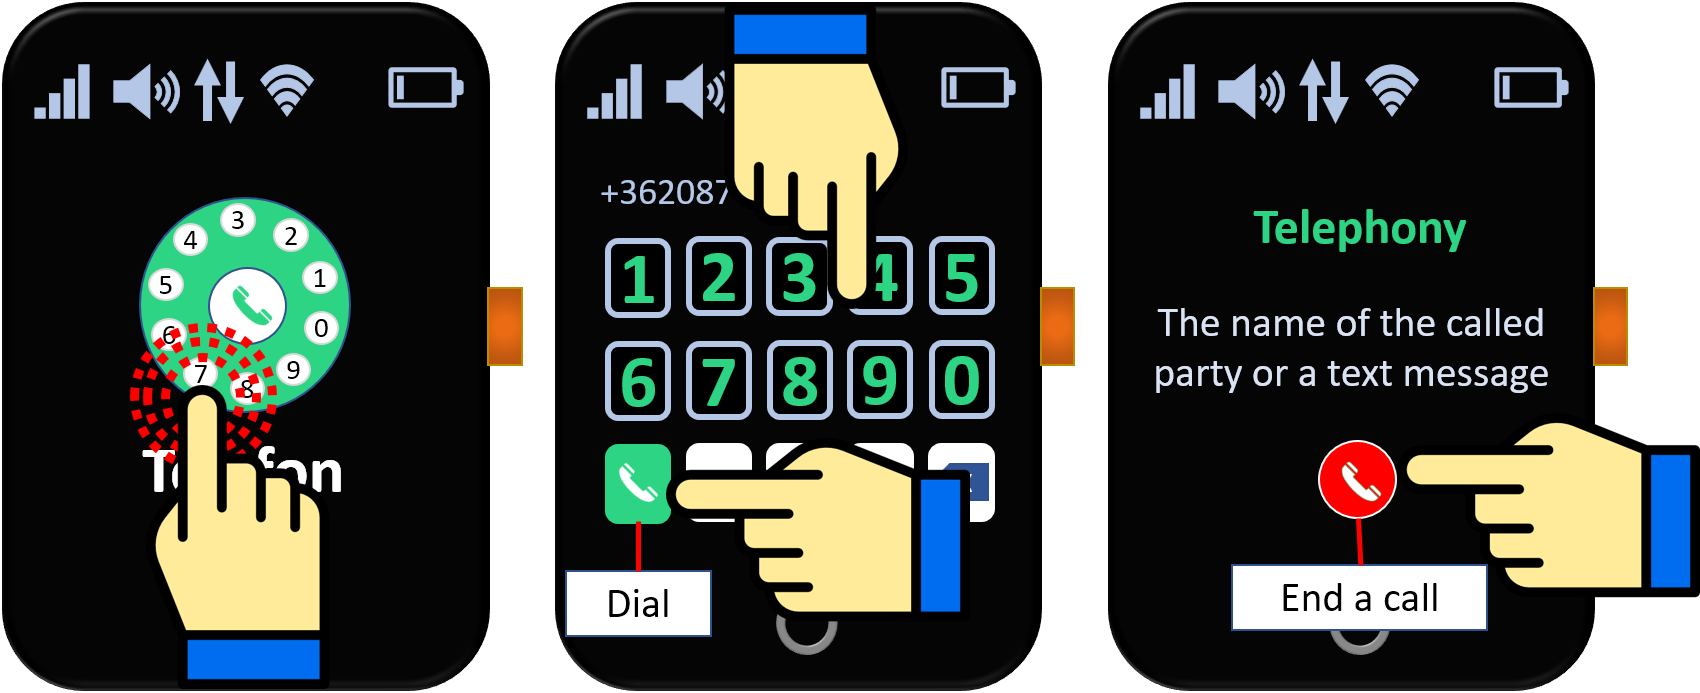
You can use the Phone (dialer) function of the clock to enter and call one of the previously allowed numbers.
As there is no text input option, the watch is not suitable for sending and receiving SMS!
Dialing steps
- Scroll to Chat and tap on the screen.
- Enter the desired number using the dial pad buttons. The entered number is displayed above the keys and can be checked.
- Tap the green phone icon in the lower left corner. The clock starts the call. If the number you entered does not match the phone number formats, the watch will not make the call. If you have problems making a call, you will be notified by voice and text message.
- During the call, the display shows the name of the called party and the end call key.
Contacts
Contacts allows you to save the names and phone numbers of contacts that you can call immediately. The function can be used as a phonebook.
To use this feature, you must have the application running on your phone in a subscription system!
Upload contacts
The contacts can be loaded in the desktop or phone application with contact information, which can then be displayed on the clock display. The contacts can store the data of 5 contacts.
The upload function is not currently supported in the application, the contact book is uploaded by the distributor at the request of the user to the email address info@nyomkovetes.net.
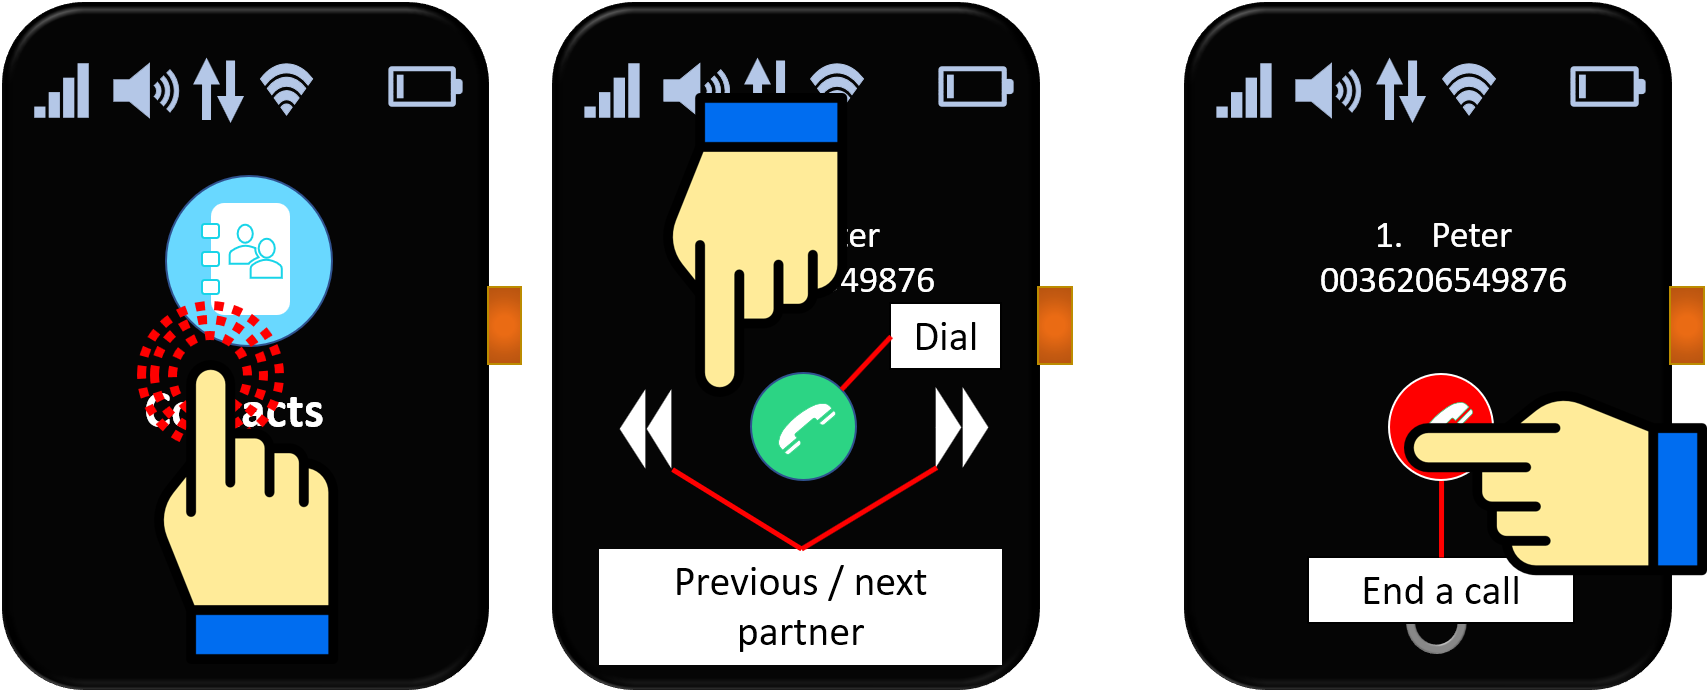
Select a contact on the clock and make a call
Steps
- Scroll to Chat and tap on the screen.
- Select the desired contact by tapping the Next icon.
- Make the call.
- The call can be interrupted or ended with the red telephone key.
Acquaintances
Feature not currently supported in app.
Step counting
If you turn on counting in an SMS message sent to the watch, the number of steps in the watch can be viewed.
Feature not currently supported in app.
Nyomkövetés könnyen és hatékonyan


