
The POI panel
The POI panel can be displayed from the System menu using the POI menu item.
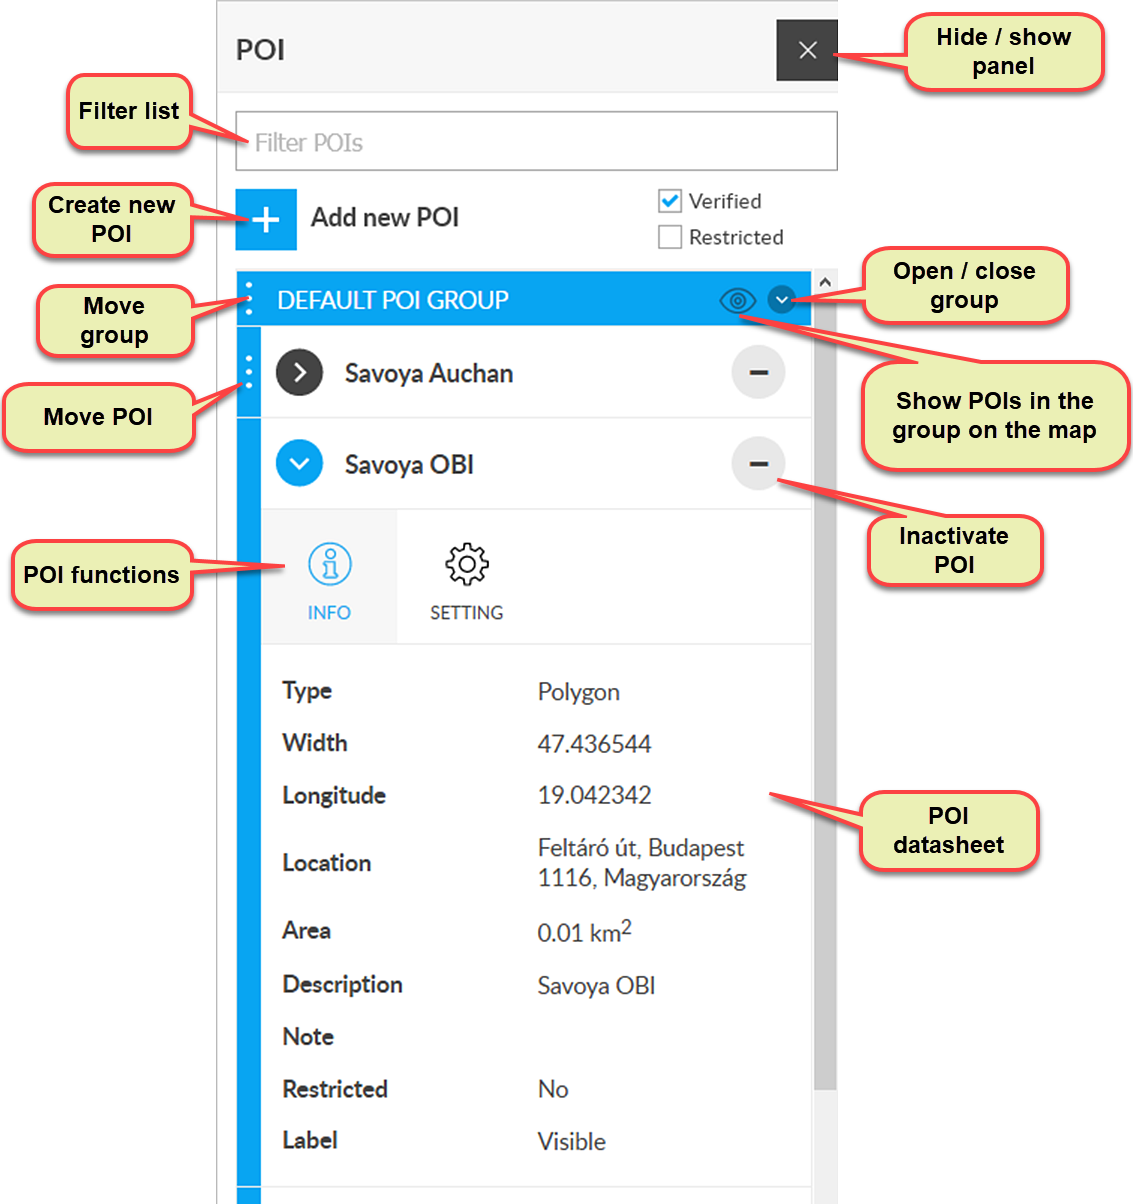
POIs registered in the system can be viewed in the POI menu. In addition to listing POIs, the menu allows you to add new POIs, set the appearance of POIs on the map, and view and modify the details of each POI.
Filter the list
If you have many POIs or use several groups, you may have difficulty finding one POI in the list. To solve this problem, use the Filter POIs field at the top of the POI menu. Use this field to filter by POI name, as follows:
- In the filter field, enter a word or phrase that contains the names of the POIs or POIs you are looking for.
- After entering, we wait for approx. 1-2 seconds.
- The system narrows the list to the POIs that contain the detail specified in the filter field.
Filter map display
POIs can be enabled or disabled (see Entering POI Information). You can control the display of enabled or disabled POIs on the map by selecting Enabled or Disabled check boxes.
Create new POI
To create a new POI, click the + Create POI icon. See Creating a POI for details.
POI list
The POIs registered in the system are shown in the POI list. POIs can also be grouped in this by entering the appropriate group on their profile when adding or editing. POI groups can be managed in the menu item System / POI / POI group registration in the menu.
Select POI
To select a POI, click its name in the list. The POI profile opens and you can make settings.
Deactivate POI
You can put the POI inactive by clicking the icon to the right of the POI names. The effect is similar to deleting, except that the inactive POI can be reactivated (made visible, manageable, or permanently deleted in the System / POI / Manage Inactive POIs menu.
Additional POI functions
The System / POI menu item contains comprehensive functions related to POIs:
- Register POI groups
- Manage inactive POIs
- Export
- Import
- Download template
Tracking easily and efficiently


